Take requests with forms
Stop retyping requests from emails and texts. Give clients a form or an email address, and every request lands on the board as a task.
IN THIS CHAPTER YOU'LL LEARN
- AMake a form
- BChoose where tasks land
- CShare it
- DOr let them email it in
AMake a form
Open Forms from the view bar, or press Ctrl F, then click + New Form.
- Give it a title and a short description.
- Add your fields, like What needs to change? and How urgent is it?.
- Add your logo and brand color if you like.
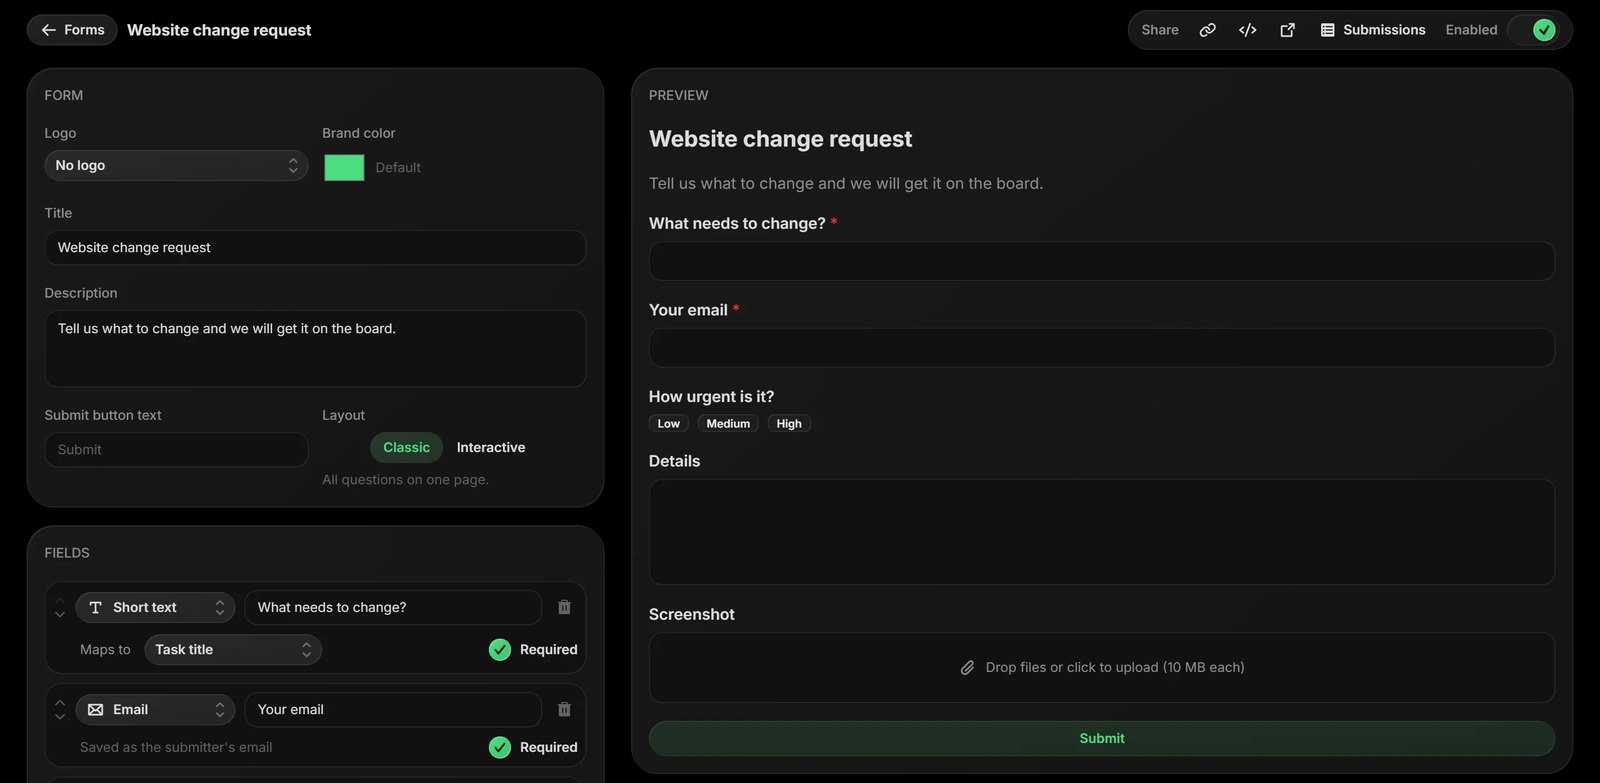
Everything saves as you go. The preview on the right is exactly what people see.
BChoose where tasks land
Under Submissions in the editor, pick the Project and Status new tasks go to.
Want to look before anything hits the board? Turn on Require approval. New requests then wait until you click Approve or Turn down.
DOr let them email it in
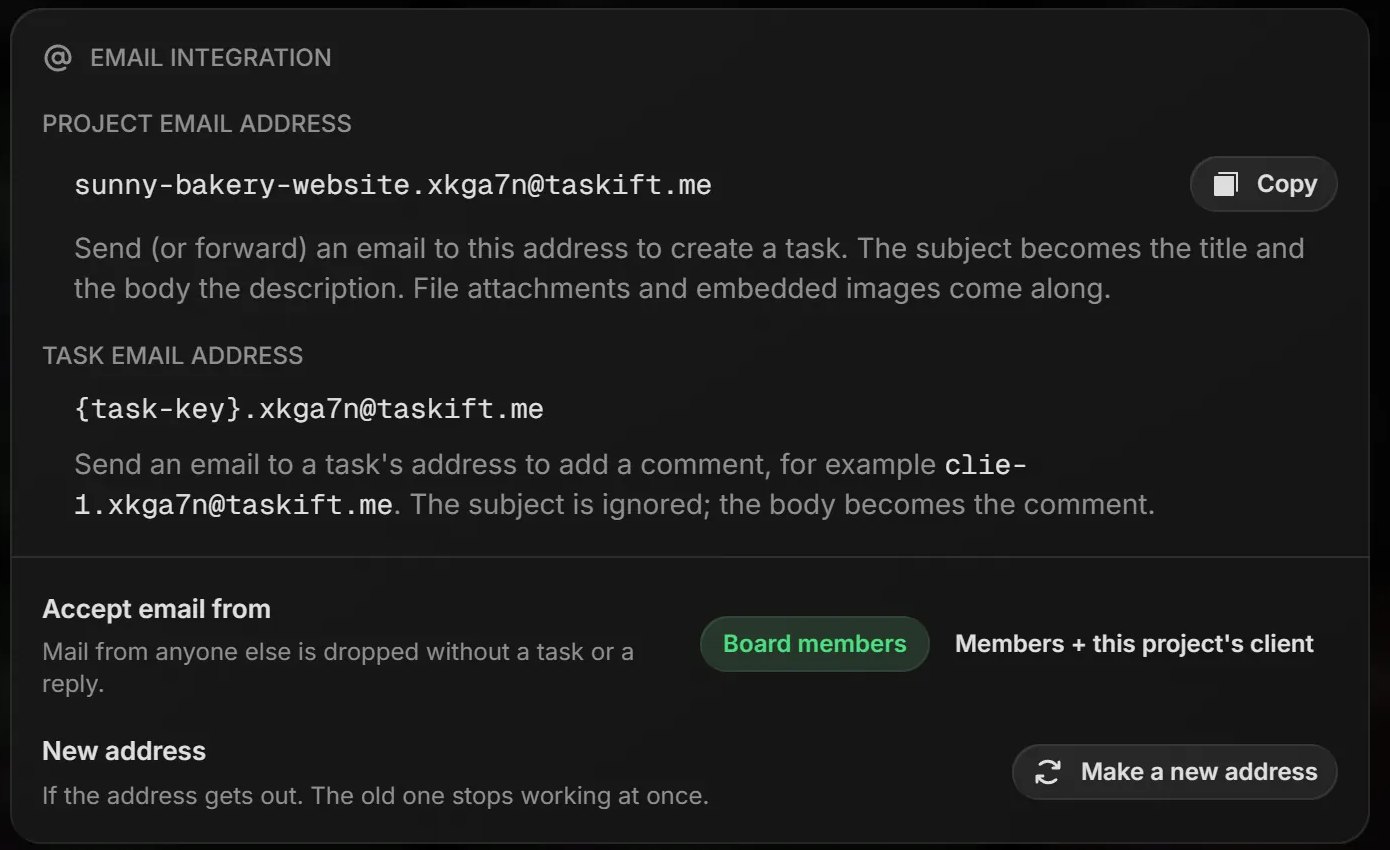
Every project also has its own email address. Send or forward an email to it and it becomes a task: the subject is the title, the body is the description, and attachments come along.
- Open the project's ⋮ menu and pick Edit Project.
- Open the Services tab.
- Under Email integration, click Copy.
PRO TIP
Set Accept email from to Members + this project's client and your client can email requests straight in. Mail from anyone else is dropped.
Requests now come to you.
Next, let the board handle the routine updates on its own.
Automate the busywork
Rules and recurring tasks that keep the board moving on their own.