Pick the right view
The same tasks, five ways to look at them. Switch views from the view bar at the top. Nothing moves when you switch.
IN THIS CHAPTER YOU'LL LEARN
- ABoard: the whole week at a glance
- BList: scan a lot of work fast
- CGantt: plan the timeline
- DCalendar: see the days
- ENotes: keep the how-tos with the work
ABoard: the whole week at a glance
Every project side by side, one column each. This is where most teams live. Drag a card to another project to move it there, comments and files included.
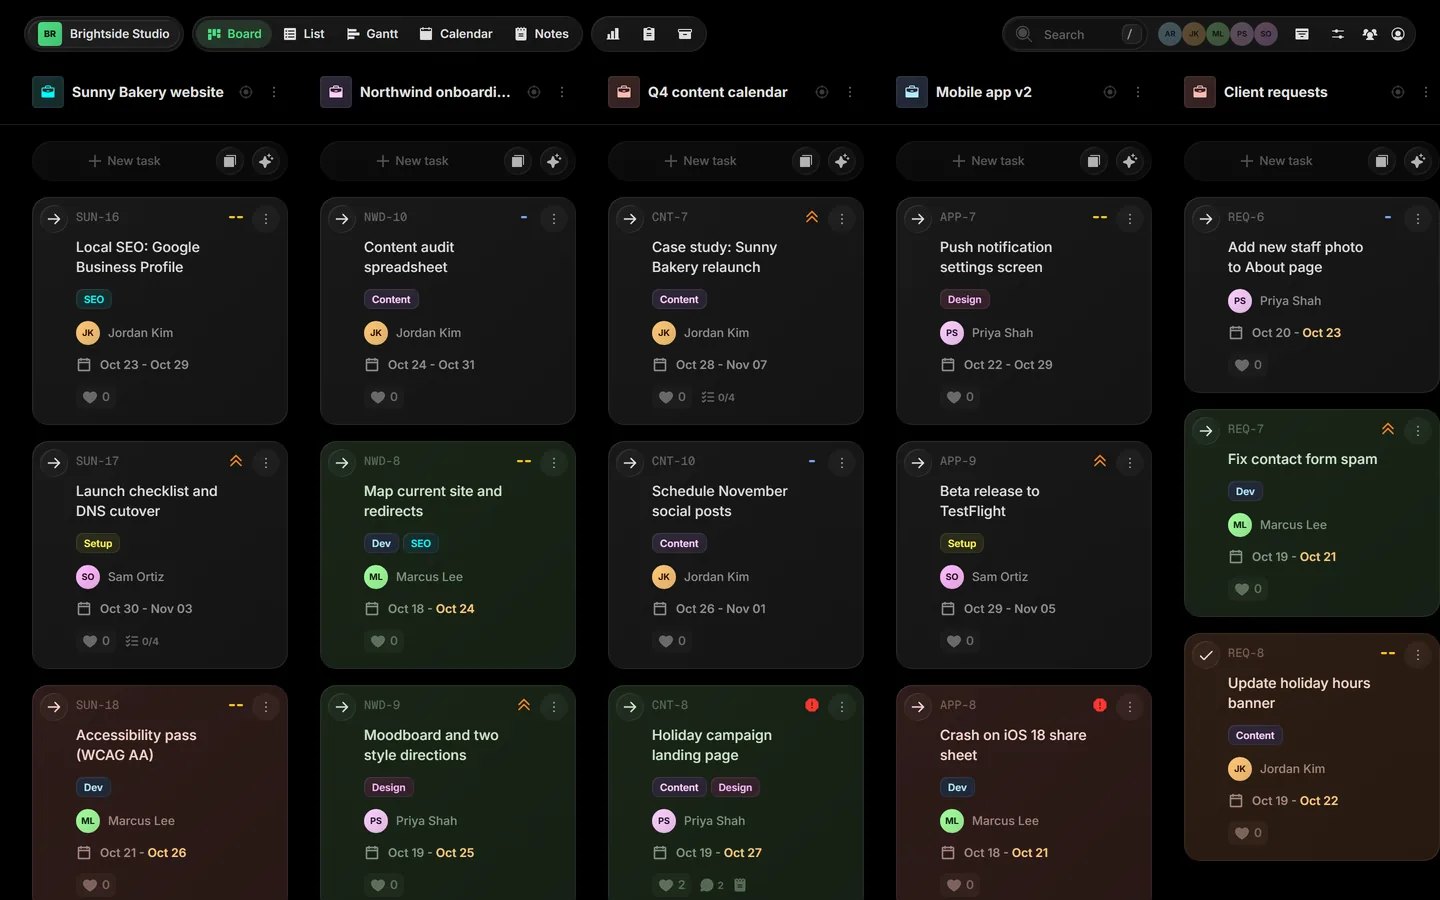
Shortcut: Ctrl B
BList: scan a lot of work fast
One row per task. Group rows by Project, Assigned or Tags, and pick which columns show. Good for reviews and for clearing out a backlog.
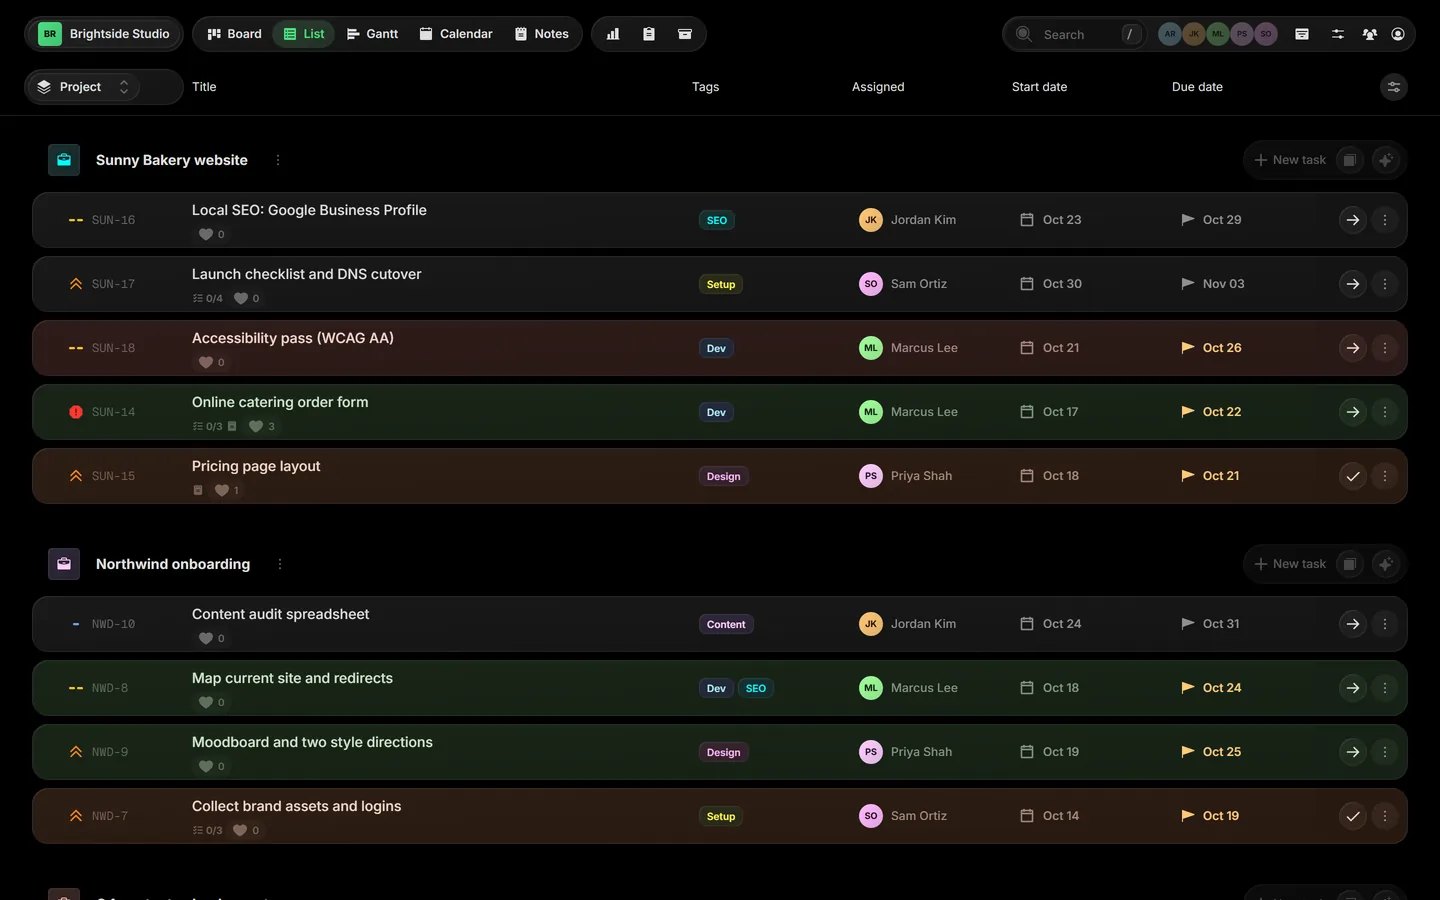
Shortcut: Ctrl L
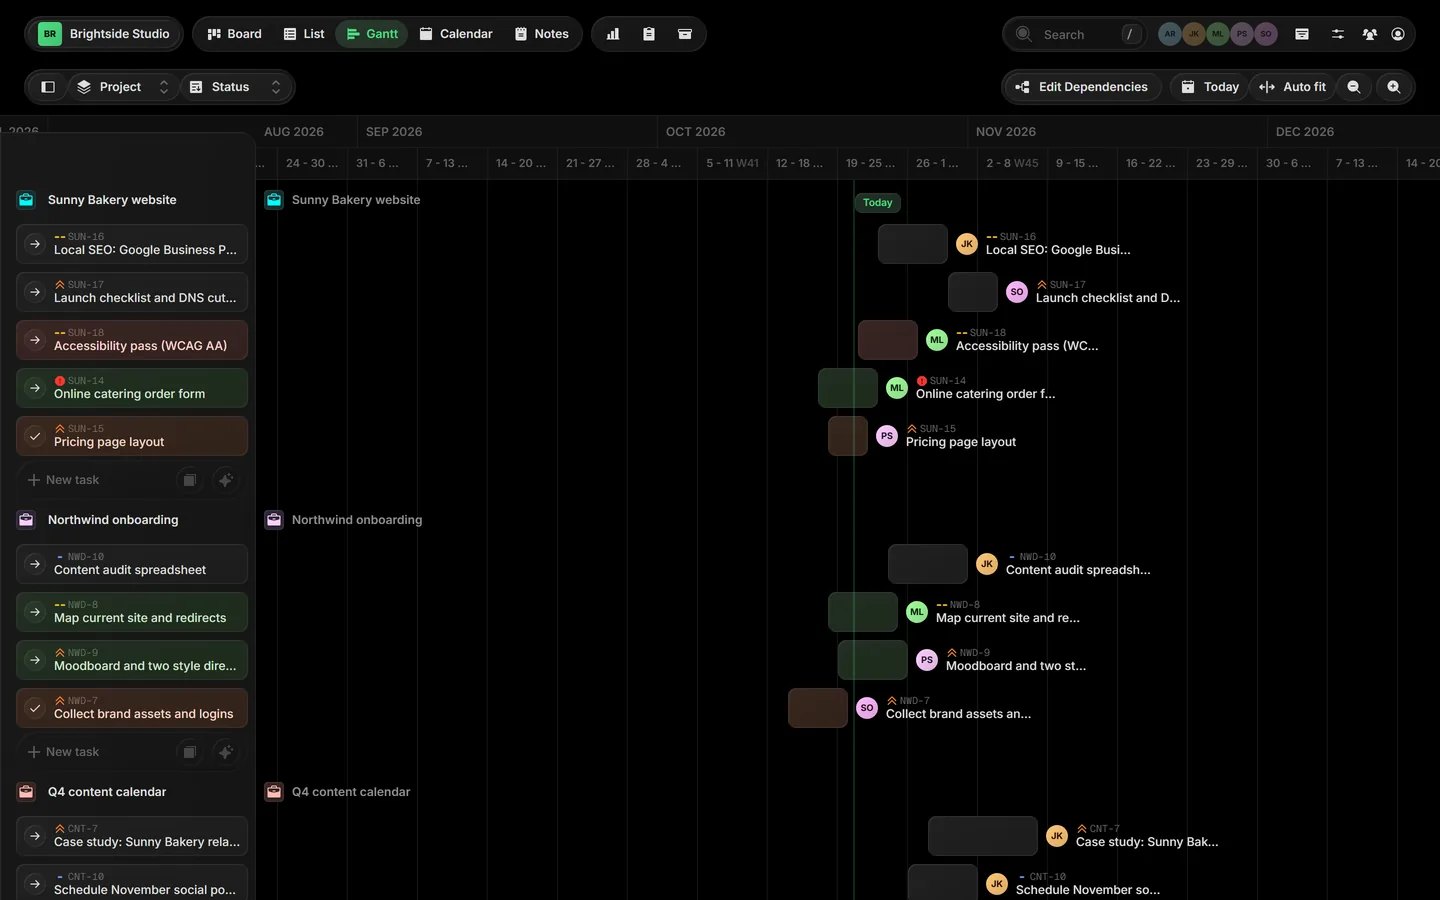
CGantt: plan the timeline
Tasks as bars on a timeline. Drag a bar to move it, drag an edge to change the start or due date, and drag across an empty row to give a task dates.
PRO TIP
Press D to link two bars, so you can see what waits on what. Esc when you are done.
DCalendar: see the days
Tasks on the days they happen, by month, week or day. Drag a task to another day to reschedule it. Click + New task on a day and the task gets that date.
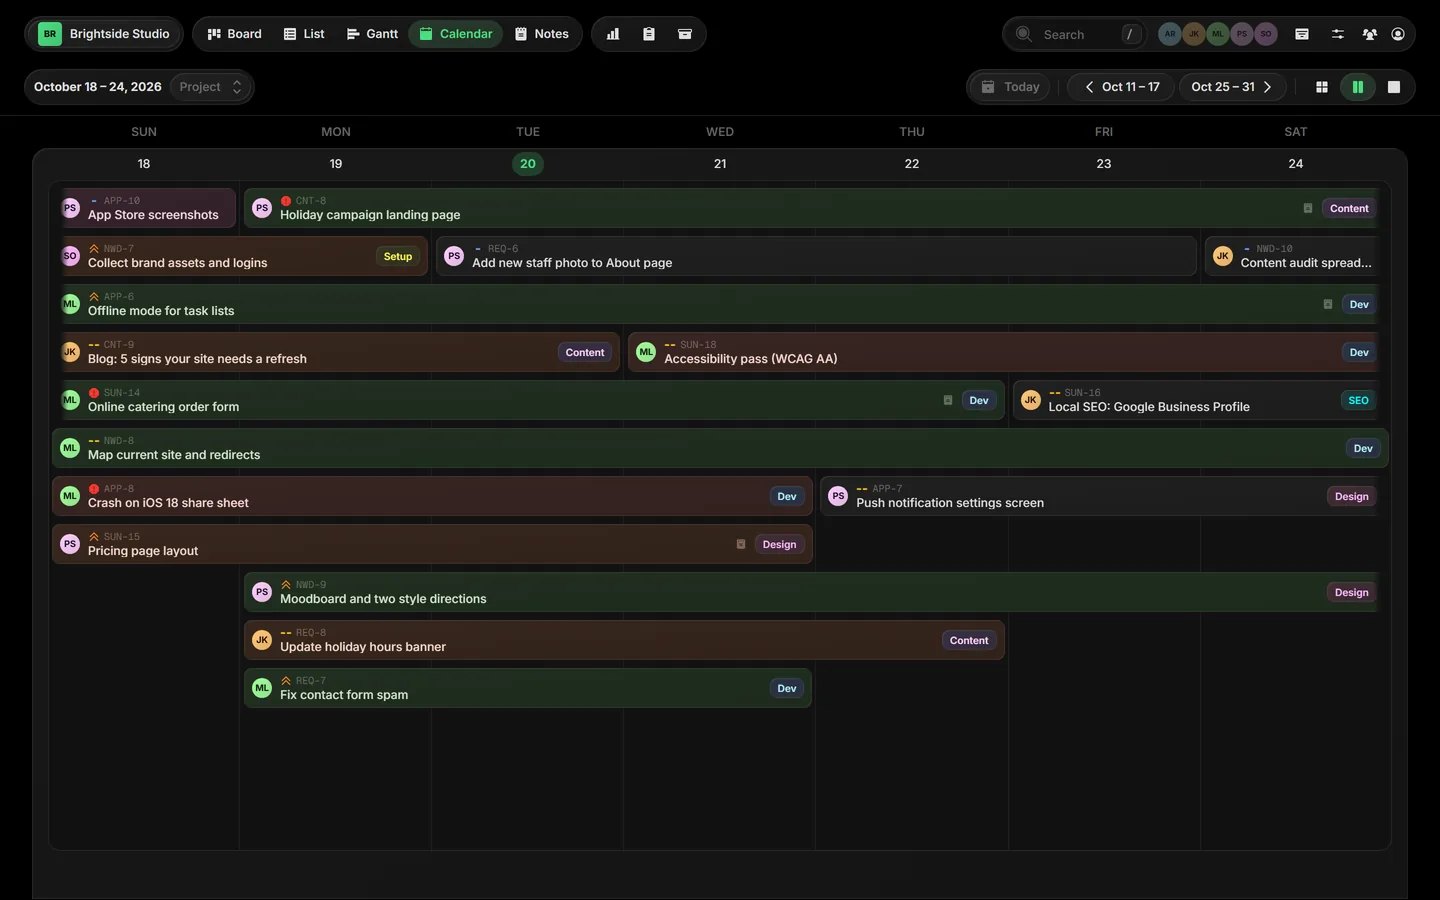
Shortcut: Ctrl C
ENotes: keep the how-tos with the work
Meeting notes, playbooks and checklists live next to the board, in folders. Each board has its own notes.
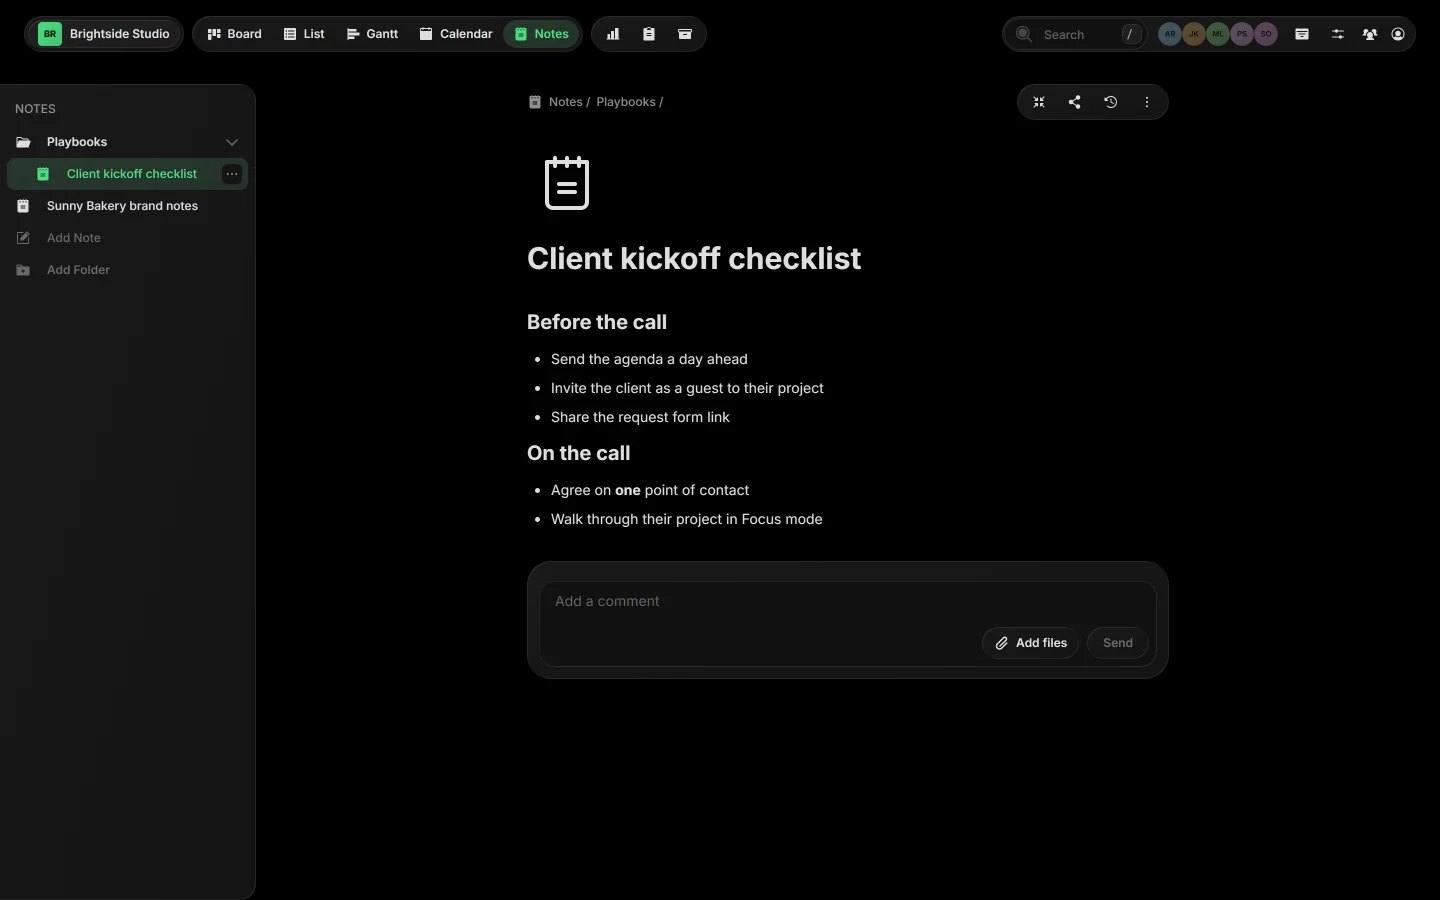
Shortcut: Ctrl O
Pick one and go.
Most teams stay on the Board and dip into the others. Next: let clients send you work.
Take requests with forms
Public forms and a project email address that turn into tasks.